For those who do not know already, here is a quick little picture guide that will help you in activating the console and allow the usage of all the commands that you may need to use to tweak a few settings here and there.
Note: Do not worry if the screenshots look different from your Steam. I just use a custom theme.
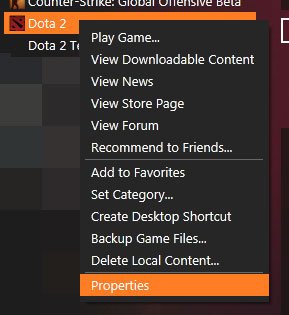
Step 1: Go to Library > Dota 2 > Properties
Step 2: Then go to Set Launch Options and enable the console here by typing in “-console” in the tab that opens up.
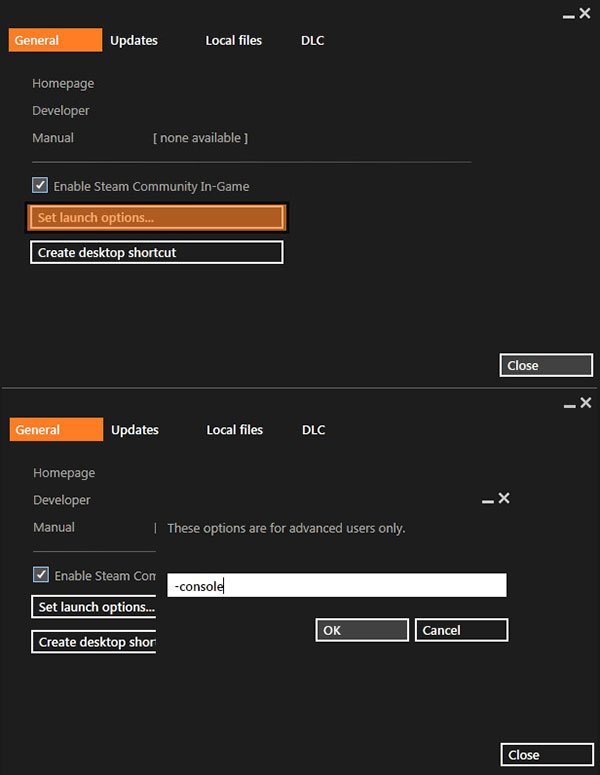
Press OK and exit the tabs. Now start the game.
Step 3: When you start the game, you should now see the console loading up.
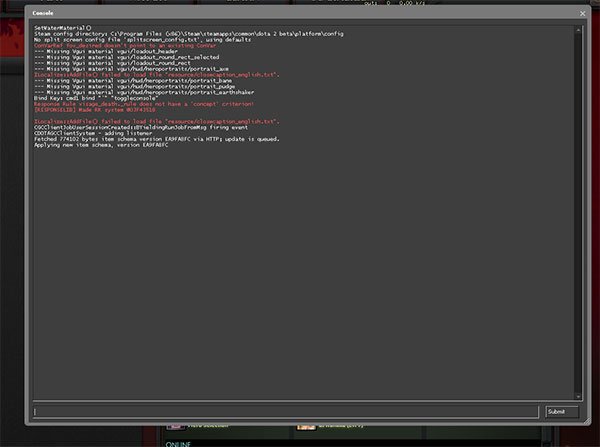
When the console is activated, you won’t be able to use the game. You can press the tilde (`) [the button next to 1] key to toggle between your game and the console.
You can any desired commands in the console following this.
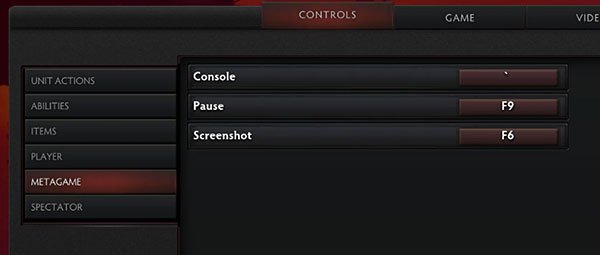
Step 4: (Optional) Dota 2 allows users to re-assign their console hotkey. You can do this in Options > Controls > Metagame tab.
Now that you have your console setup, you can find all dota related commands under the dota_ prefix. To go through them, just type dota in the console and scroll down.
WARNING: It is suggested that you do not mess with these settings and configurations if you do not understand what they are. You may affected your game completely and might have to re-install.
Visit the Dota 2 Wiki Console Commands page to learn more about these console commands.
EXTRAS: Activating Net Graph
One of the main reasons why people activate the console is to activate the net graph that gives them access to their ping to the server, frame rate and other useful info. Here are some quick tips from my very old guide to get a unhindered net graph in Dota 2.
Type net_graph 1 in the console to activate the net graph.
Once you have done this, you will find a bunch of numbers pop up on your screen and they maybe too big and covering up a lot of stuff a bit too much for your liking. You can tweak the size of location of the net_graph by using the following commands.
- net_graphheight – Adjusts the height of the Net Graph display
- net_graphinsetbottom – Defines the position of your Net Graph in relation to the bottom of your screen.
- net_graphinsetleft – Defines the position of your Net Graph in relation to the left hand side of your screen.
- net_graphinsetright – Defines the position of your Net Graph in relation to the right hand side of your screen.
- net_graphinsettop – Defines the position of your Net Graph in relation to the top of your screen.
- net_graphpos – Toggles the position of your Net Graph (either 0 or 1)
- net_graphproportionalfont – Toggles font size to be proportional to your resolution (either 0 or 1)
- net_graphtext – Toggles the text of the Net Graph (either 0 or 1)
- On a monitor running with a resolution of 1920x1080px, use the following settings to get a beautifully placed net_graph like you see in the image below. (Remember that these values change for every resolution so you will need to tinker a bit to get the results that you like.)
net_graphheight 64
net_graphinsetbottom 437
net_graphinsetleft 0
net_graphinsetright -30
net_graphpos 1
net_graphproportionalfont 0
net_graphtext 1

Here are some extra additonal net_graph commands. Do not use them if you do not know how they function.
- net_graphshowlatency – Toggles the latency of the Net Graph (either 0 or 1)
- net_graphmsecs – The latency graph represents this many milliseconds
- net_graphshowinterp – Draws the interpolation graph