Here is quick guide that will run you through all the required stuff that will allow you to begin creating your own content for the Dota 2 Store. I will try to keep the guide as detailed and visual as I can so that it will be easy to understand and follow.
With that being said, it is understood that you have a basic experience in 3d modeling, animation, texture work and related content. If you do not understand any terminology, please Google it or message me on my Facebook Page and I’ll try to help you out.
Step 1: Getting Your References
You might be an amazing 3D artist but it is very important that you get reference models from in the game to get started with on creating new content. This will not only make the job much easier for you but also help you design better.
So the first step would be to extract the models / materials / animations and other raw content from inside the game. Valve stores all of their packaged content (never code) under the VPK (Valve PAK) format. If you’re familiar with modding other games from the company, you will be familiar with GCF files. The VPK’s are more or less the successors to these files and can be extracted in the same way the GCF’s were done – using GCFScape.
Download and install GCFScape. Now visit your Dota 2 folder (C:\Program Files (x86)\Steam\steamapps\common\dota 2 beta\dota) and find the “pak01_dir.vpk” which is the parent extraction file that will rip out all the content from all archives attached to it. Open this file in GCFScape and extract all the content you see to a new location or only the models and materials folder if you only wish to create new cosmetics.

Step 2: Understanding Models and Textures
Now that you have extracted your files, you can see that all your models and materials are now available and can be edited. But there are a couple of things you need to do before you get started on that. The models are stored and packed to be read by the Source Engine and unfortunately you will not be able to edit or modify them directly. So this will require you to decompile the models but that is the next step.
Valve stores all models in the form of MDL files which are more or less packages of SMD files which contain the actual object and the relevant data. It is these SMD’s that you will need to import to a 3d program such as Maya, 3D Studio Max or Blender and work on.
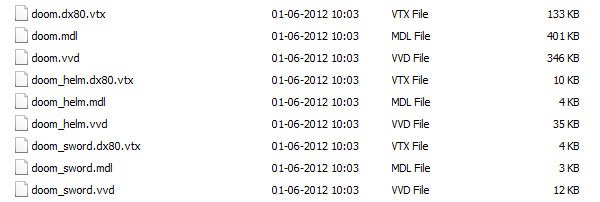
Each MDL file will be accompanied by two other similar named files of the formats VTX and VVD. All the mesh data including information such as the LoD (Level of Detail) for that model are stored in the VTX files while all the data of the vertices that comprise of the model are retrieved from the VVD (Valve Vertex Data) files.
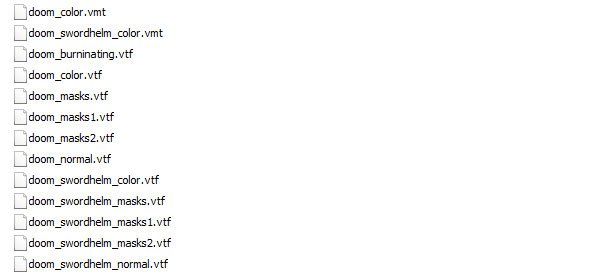
On the other hand, the texture files are stored in the form of VTF (Valve Texture File) and can be extracted into a TGA, PNG or other familiar image formats for editing in Photoshop or other related tools.
Each VTF file is accompanied by a VMT (Valve Material Type) file that contains all the required information for the source engine to define and execute content present in the textures. In the example below, you can see how each of the above MDL packages has it’s own texture file..
Step 3: Decompiling the MDL’s
The next step will be to decompile the MDL’s that we gained from extracting the VPK’s. To do this we need to use one of the Valve suggested decompilers such as the StudioCompiler.
One of the problems with StudioCompiler is that it is was not designed or upgraded to extract models from the Dota 2 files which are far newer than the program itself. So you will need to tinker the files a little bit to get this program to work with the files we have at hand. It is nothing complicated. Read on to find out how.
After installing the StudioCompiler, it is time to set it up. The program now works independent of Steam but it still makes use of the SDK to actually help decompile the files. Unfortunately there is no Dota 2 SDK available at this point of time so one will have to make do with the Alien Swarm SDK or the CS:GO SDK, both of which are available on Steam. Many do not have access to the CS:GO SDK, so I will make this guide based on the Alien Swarm SDK that you can find in Library > Tools.
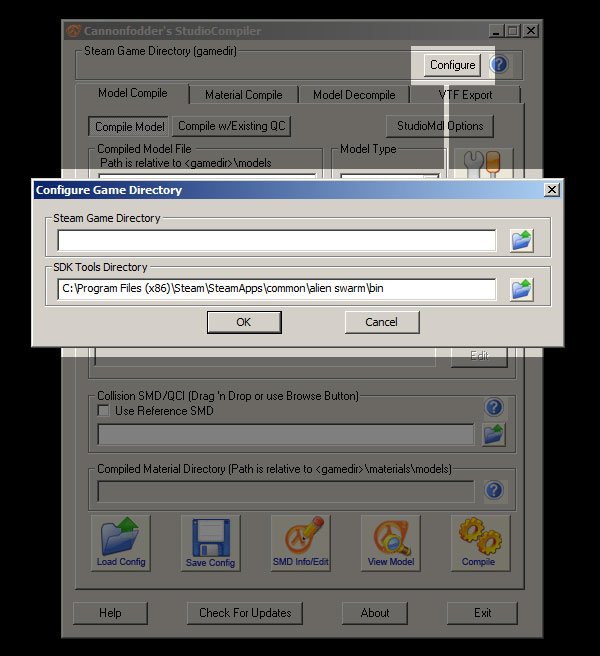
NOTE: People have been reporting that the StudioCompiler crashes when they try to browse to the bin folder. If that happens to you, just copy-paste the address of the folder directly instead of browsing to it. Seems like the buttons on this dialog of the compiler are buggy. It should work just fine if you copy-paste the address instead of browsing your way to it.
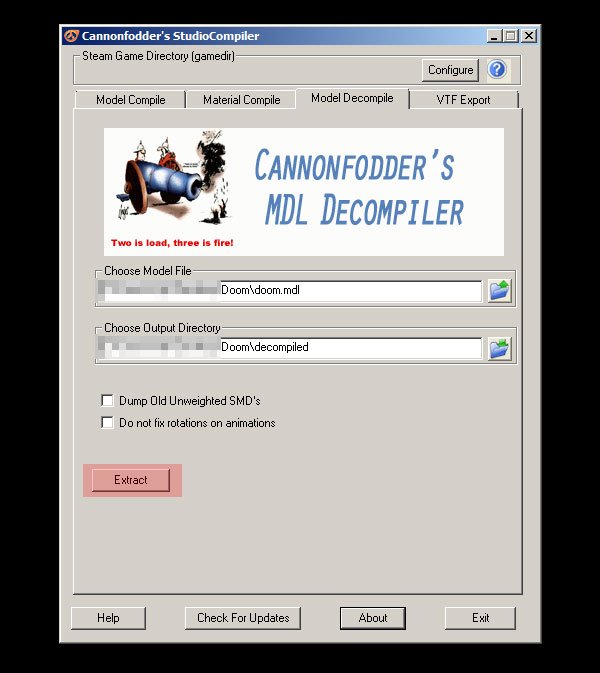
Once you have your SDK’s installed, open your StudioCompiler. At the top you can find a button called configure. Once you pop that up, you will need to enter the address to the directory where your SDK is present which is primarily what you see in the picture below.
Congrats! You now have the decompiler all set and ready to go. Just one small thing left to do. Remember I mentioned that the compiler was not designed to extract Dota 2 models? The problem is that the compiler cannot read the data of the vertices from the Dota 2 files. So you will need to trick it in to believing that it can. How do we do it?
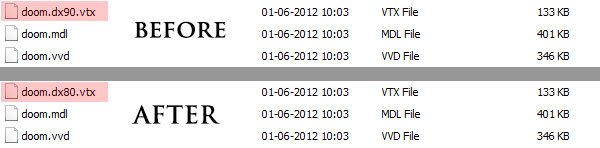
Go to the folder of the model you wish to extract. I will stick to my Doom Bringer example. Now I wish to extract “Doom.mdl” but the problem is that the vertex data cannot be exported. Like I mentioned earlier all vertex data is stored in the .VTX files. So you will have to look for the file “Doom.dx90.vtx” in the same folder which is the vertex file for my Doom model. All you need to do is change the “.dx90″ to “.dx80″ and your compiler will now be able to edit the extract the models. I will explain this change some other day. For now just blindly do it for every model you wish to extract.
Now that is done, go to the Compiler and use the Decompiler to extract the models. Enter an output directory and press Extract.
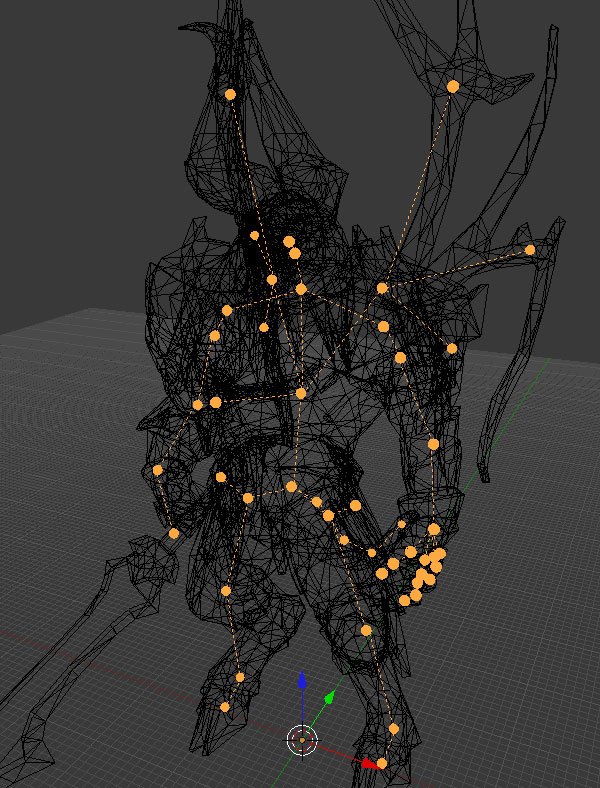
Once you have decompiled the files you will gain access to a bunch of SMD model files that can be imported to any 3d program to be played around with. Unfortunately no 3D program comes with default support for SMD files so you will have to get the plugin that will allow you to import these files. I’ll have them linked to you below.
SMD Importer for Maya
SMD Importer for 3D Studio Max
SMD Importer for Blender
Textures can be exported the same way. Use the StudioCompiler Texture Export tab to load your VTF and export it in the form of a TGA or PNG for editing and further usage.
Step 4: Editing the models / Creating new content
There is not much for me to tell you here because it is your talent and creativity that has to be put into effect now. But I will give out a little tips that will help you arrange your work flow better.
- Be sure to stick to the required LoD’s when creating your new models. While high polygon count models are definitely fancy and of higher quality, they are not viable to be implemented in a game.Dota 2 content in particular uses 2 values for the level of detail. One of them is for the models, avatars and other purposes while the second one is for the in-game models themselvs. Preferred LoD values are mentioned below.
- Items | LoD (promotional) = 500, LoD (in-game) = 250
- Couriers | LoD (promotional) = 6000, LoD (in-game) = 3000. You will be able to find more detailed LoD quotients for models on their respective character pages on the the Official Dota 2 Website.
- Do not stick to it right down to the line but try to be somewhere close so that it is lesser work for Valve to implement it in to the game when you submit your content to the store.
- When you are creating your textures, remember that all models use three texture files to get the job done. The primary being the diffuse map (along with normals) and two masks. The quality that you lose on model design can be compensated with amazing textures.
- Try to create content that can be easily attached to a bone on the existing rig of the model. While this is definitely not a required condition, it will make life far easier for everyone dealing with it including yourself.
- Have fun modding!
- You can also take at the Texture and Art Guide by Valve that will give you an insight on how it’s done inside their offices and neat tips on the style and flow to maintain when working on your cosmetics.
Important Update | July 25, 2012 – You will not need to do any of the below steps to compile anymore. The workshop now accepts raw submissions that will automatically be compiled and formatted to suit any needed requirements. Read this post for more information on this update.
Step 5: Compiling your model (No longer required)
Update – You will now be able to submit your work directly in the form an OBJ and TGA’s so there will not be any need on your end to compile the model. Fore more information, read through on this neatly framed Guidelines and Requirements FAQ that you might find really helpful.
I will let the process down below stay anyway for those who are interested in knowing.
Many have been facing a lot of errors with the old method of compiling that I posted up. So here’s a faster and simpler way of doing the same using the QC of the model and a program called the GUI Studio MDL which you can get through the link.
If you check your list of decompiled files, you will find a QC script file that contains the commands to convert an object from it’s SMD format to a binary model that we can import and use in a game.

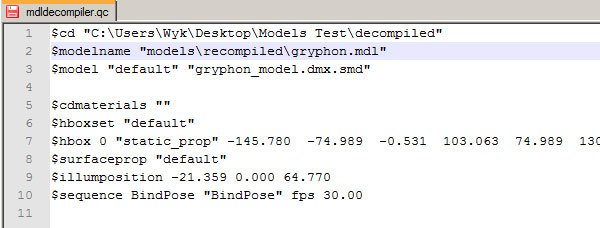
Now we will try to compile this Gryphon model that I have back in to an MDL. Before you go ahead with this, some slight editing to needs to be done to the QC file so we don’t over write or make any changes that we do not want. The QC file is a script file that can be edited by any text editor – I suggest you get Notepad++.
Once you have Notepad++, open up your QC file in it and you should see something like this below.
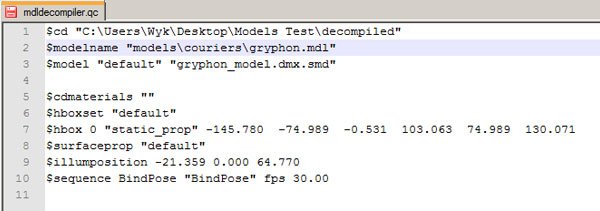
The GUI Studio MDL program linked to above is what we will be using to compile the models. It will make use of the QC file along with the Alien Swarm SDK to get the job done. So basically, if you read through the script, it asks the program to compile a file called the gryphon_model.dmx.smd into an MDL located in Alien Swarm SDK\swarm\models\couriers. I do not want to overwrite this so I will create a new folder called recompiled in the Alien Swarm SDK\swarm folder and edit the script and save it.
Your changed and edited QC should look something like this.
IMPORTANT NOTE: This is just editing the original QC script to suit our need but this may not work in every instance. I suggest you understand and learn the working of QC’s so you can write your own script in any case that you have to. You can find all the information you want about QC’s here on the Valve Wiki.
Once this is done, open up the GUI Studio Model program that you downloaded from the link above. When you open it for the first time, it will give you an error of this nature.
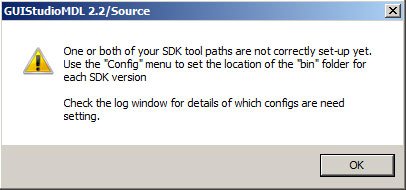
Do not worry. It is just because the paths are not configured. In the program menu find Config > Set Orange Box Tools Path. Once you have that open, set it to the location of your Alien Swarm SDK’s bin folder. The same folder which you used in the decompiler. Once configured, the Target Mod column in the program should read “Alien Swarm.”
Now all that is left to do is load the QC file and compile it. So just do it. If all goes smooth, you should have the success confirmation in the program and the files in the SDK folder you specified.
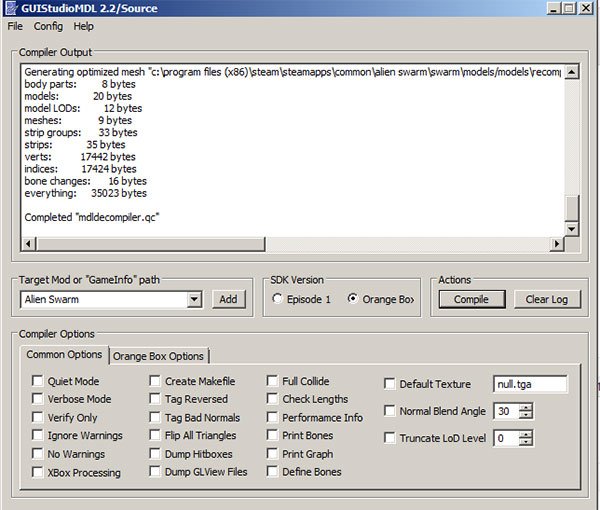

As you can see, you will get all the needed files when compiled.
IMPORTANT: If you are seriously trying to contribute items to the Dota 2 Store, then I suggest you only make addons for those heroes who are already split into multiple parts and have slots available for implementation. The list of such heroes grows every week as the patches roll in so the best way to keep track of this is in the Store itself.
Open the Store in the game and go to Equipment > Sort by Hero. Once you have done this, you can check the list of heroes that already have items up and available. Try making for those only at the moment.
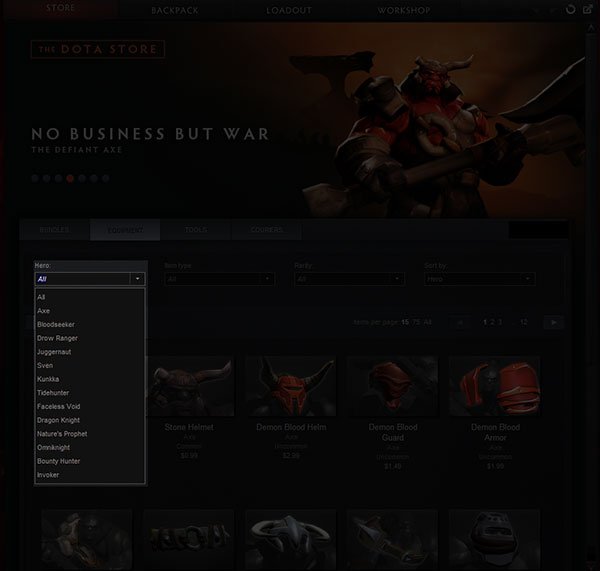
Once you’ve decided on a hero, go to their loadout tab and see what slots you have at hand to make items for. For example: I want to make new items for Bounty Hunter. So I go to his loadout tab and check what slots I have at my disposal.
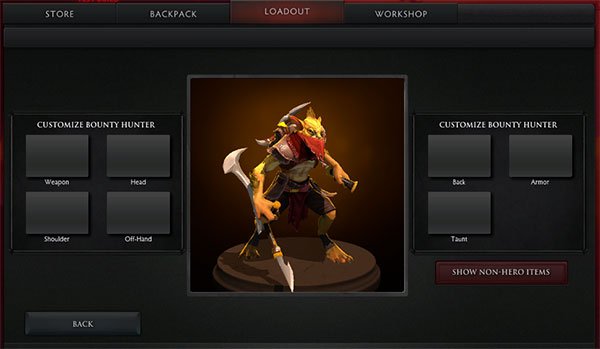
From this I can see that I am allowed to make items for him on the Weapon, Head, Shoulder, Off-Hand, Back, Armor and Taunt slots. You can open one of these split parts of Gondar as reference and get started.
Step 6: Publishing your content (No longer required)
The easiest and happiest step of them all. Pack all of your work into a ZIP file. Make sure that the root folder of your ZIP has all the folder assigned correctly.
For example, if I were to pack my new Scythe weapon for Doom Bringer, my folders for submission would be something like this.
root
models > heroes > doom > doom_scythe.mdl
models > heroes > doom > doom_scythe.vvd
models > heroes > doom > doom_scythe.dx90.vtx
materials > models > heroes > doom > doom_scythe.vtf
materials > models > heroes > doom > doom_scythe.vmt
Once you have your ZIP file ready, open your Dota 2 client and go to the Customize > Workshop > Publish New Item tab. Fill the form up and you’re good to go.
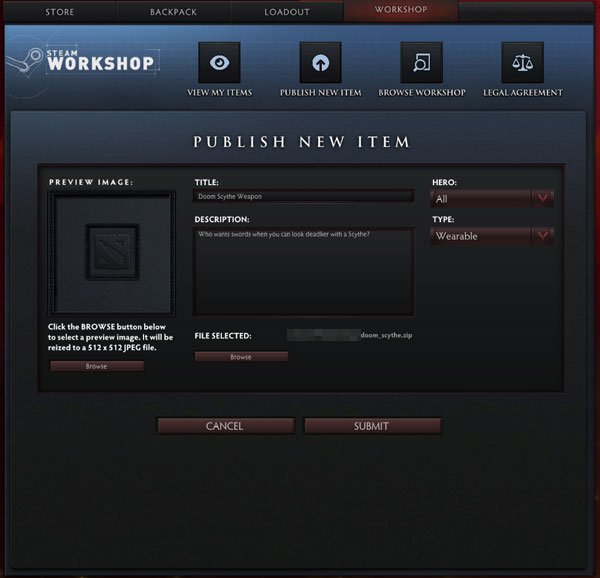
Once your file is submitted, it will be added to the Steam Workshop where other users can get to comment, make suggestions and rate it while Valve takes time to go through it, refine it and see if it is good enough to be implemented to the game. This takes time. So be patient.
Goodbye Note:
I’ll bring in more tutorials in the near future on how to make models that are suitable for Dota 2 – right from designing them to texturing them and lots more. The programs I will be using are Maya, Mudbox and Photoshop. So to all those interested, I would suggest you get yourselves familiar with the basics of these programs.
I hope you enjoy the guide and like always – Stay Good. Live Long. Have Fun. Follow me on my page for all the latest updates.